Whilst this blog is predominantly about game and App development, its nice to sometimes blog about other things close to my heart. In this instance its Coffee.
I’ve written a post on Coffee in the past and my enthusiasm for the substance continues to increase unabated. Today I’ve had my first attempt at home roasting. This is a short, candid, post about my experience.
A little side comment: You should own this book (The Blue Bottle Craft of Coffee). Its brilliant! Honestly, the best book about Coffee I’ve ever read.
For a long time I’ve been afraid of home roasting. I’ve read that the results can be poor and that it produces heaps of smoke and mess. Lets find out!
First I assembled the right equipment.
Scales, A perforated oven tray (the one below is for pizza), 2 metal sieves, a wooden spoon. I bought them from Robert Dyas (a UK hardware/home store) for about £15 (sans scales which I already own).
Other things you will need (but hopefully already have): An oven, a ventilated kitchen, a kitchen door, oven gloves, an air tight jar, a patio or easy/fast access to some other outside space, and of course some green coffee beans.
The first thing I did was to weigh out the coffee beans. The book says 150 grams which I found to be about a small coffee cup full. I then spread these out on the tray in a single layer.
First Tip: In this photo I have overfilled the tray. The book says as much but I thought it would be okay. You need less beans on the tray otherwise they burn (more on that below).
The book says your oven should be preheated to 260C. My first thought was “oh cr*p, my oven only goes up to 250C!” but, as I didn’t have much choice, I proceeded anyway. I preheated the oven for 30 minutes. The beans went into the oven and I started the timer on my iPhone.
At 3 minutes I heard a cracking sound. “Oh bugger” I thought. Apparently whats known as first crack is supposed to be heard at 7-8 minutes. I’m not sure why I heard this early. My thoughts are that the beans on the outside of the tray are heating earlier than those in the middle. This could be as a result of me overfilling the tray. It may also be that first crack refers to the majority of beans cracking. I don’t know yet and need to investigate some more.
At 3.5 minutes, I agitated the beans. At this stage they were starting to smell rather pleasant actually. I could hear more cracking, best ignore that and stick to the plan I thought.
At 5.5 minutes, I agitated the beans again. I could still hear cracking.
At 7minutes and 44 seconds, the beans were really cracking. All of them. Quite rapidly. I assume this was the actual first crack.
At 8 minutes and 15 seconds, I agitated the beans again. They were really starting to show their colour now.
Then everything became a bit of a blur. My understanding was that I was supposed to be listening for a moment of silence and then a second round of cracking. I honestly can’t say that I heard this. I ended up taking them out at around 10 minutes.
Second Tip (Smoke): I was expecting a kitchen filled with smoke so thick that I couldn’t see my hand in front of my face. If smoke is your reason for not home roasting, don’t worry. Yes, there is smoke, but its not that much. When you open the oven door you get a waft of grey smoke – sort of like when you burn oil in a pan by mistake. It does sting your eyes though so watch out for that.
Third Tip: Its quite a smelly process. I managed to limit it to the kitchen but it does fill the room with a smokey smell.
I dumped the beans from the tray into one of my sieves. I did lose a few in the process. Then I rushed, via the lounge, to our balcony. At this point I began repeatedly dropping the beans from one sieve into the other.
Fourth Tip (Chaff): Oh god the chaff. When you roast coffee beans the husk/skin separates from the bean. All I can say is there is lots of it. Even outside it gets everywhere, on your clothes, skin, etc. I’m sure people below thought it was snowing! Thankfully, there was very little in the house. Its only during the cooling process outside.
Once cool, I emptied the beans into a jar.
You’ll note that there’s a huge variation in the bean colour. This is where I think putting less beans on the tray would have helped.
The book says that the beans continue to improve over the next 5 – 10 days. I have experienced this first hand as I buy freshly roasted beans and have noticed significant flavour improvement a few days after purchase.
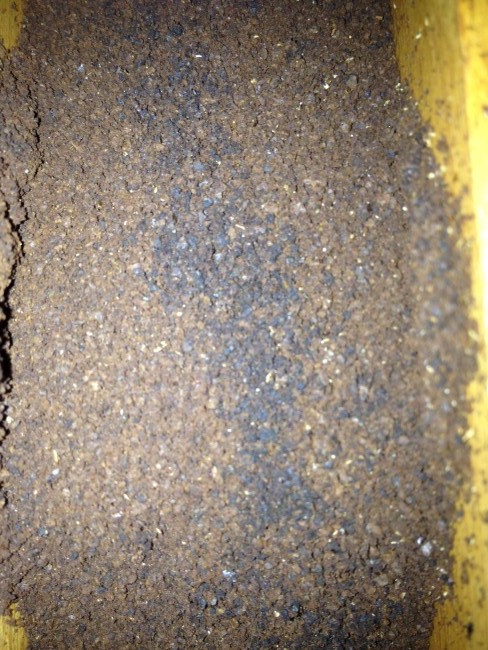
I was eager to try a cup and so ground the beans using my trusty old Zassenhaus hand grinder.
You’ll probably notice the grey streak of ash!
I continued anyway and brewed a cup of coffee using my cafetiere.
What did it taste like?
Initially very rich but then predominantly burnt! It smelled burnt too, both after roast, after grinding, and in the cup.
I think the mistakes I made were overfilling the tray and leaving the beans in the over for too long. It was heaps of fun though and I’ll definitely be doing it again. You can’t expect to get these things right first time (coffee isn’t like that) and I’m already eager to try again.
Give it a go.


